Top knot buns are no longer just a trend; they have become a classic and versatile hairstyle that suits a wide range of occasions. Whether you’re going for a relaxed, messy bun for a casual day out or a sleek, polished top knot for a formal event, this hairstyle offers endless possibilities. In this article, we will guide you through the process of mastering the art of the top knot bun. We’ll cover the basics, provide step-by-step instructions, explore popular variations, and offer tips to ensure your top knot bun stays in place. Let’s get started on your journey to perfecting this stylish and timeless look.
The Basics of Top Knot Buns
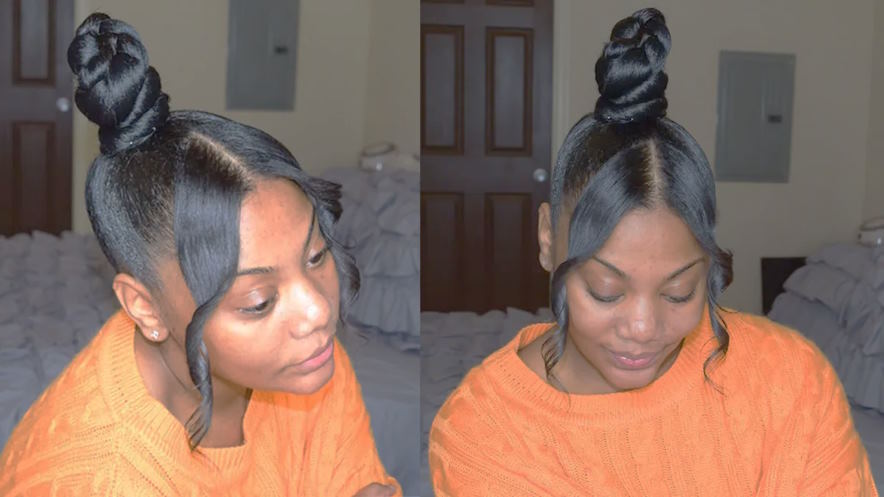
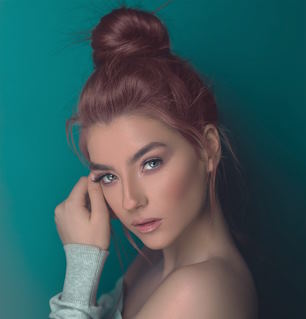 Before we dive into the practical steps, let’s clarify what exactly a top knot bun is. It’s a hairstyle that involves gathering your hair into a bun positioned on the top of your head. What makes top knots so popular is their versatility – they can be messy and relaxed for a laid-back look, sleek and elegant for a formal occasion, or even a half-up style for a perfect balance between casual and chic.
Preparing Your Hair
- Hair Texture and Length Considerations: The top knot bun is achievable for most hair types and lengths, but some variations may require more or less hair. It’s important to adapt the style to your hair’s unique qualities.
- Necessary Hair Tools and Products: Gather your essentials, including a hairbrush or comb, hair tie or pins, and hair products like texturizing spray or hairspray.
- Hair Washing and Conditioning Tips: Clean hair is generally easier to work with, but you can also achieve top knot buns with second-day hair. Just ensure your hair is manageable and not overly greasy or oily.
Step-by-Step Guide to Creating the Perfect Top Knot Bun
- Sectioning Your Hair: Begin by parting your hair from ear to ear, creating two sections: the upper section (for the bun) and the lower section.
- Creating a Ponytail: Secure the upper section with a hair tie to create a high ponytail. You can adjust the tightness based on your desired look.
- Twisting and Wrapping the Bun: Twist the ponytail and wrap it around the hair tie’s base, forming a bun. Tuck the ends of the ponytail and secure with pins or an additional hair tie.
- Securing the Bun: Use hairpins to secure any loose sections or to adjust the shape of the bun. Hairspray can be used for extra hold.
- Styling Tips and Tricks: If you want a more relaxed look, gently pull on the bun to create volume and texture. For a sleeker appearance, smooth out any flyaways and add more hairspray.
Popular Top Knot Bun Variations
- The Messy Bun: Achieve an effortlessly chic look by leaving some strands loose and embracing the imperfections.
- The Sleek Bun: For a sophisticated and polished appearance, ensure your bun is perfectly smooth and secure.
- The Half-Up Top Knot: Combine the best of both worlds by leaving some hair down while still enjoying the benefits of a top knot.
- Tips for Long-Lasting Top Knot Buns
- Using the Right Hair Accessories: High-quality hairpins and hair ties are essential to keep your top knot bun in place.
- Adding Hairspray or Texture Products: These products can help maintain the bun’s shape and hold throughout the day.
- Avoiding Common Mistakes: Be aware of common mistakes like pulling your hair too tight, which can cause discomfort and stress on your hair.
Top Knot Bun Inspiration
Celebrities and influencers have embraced the top knot bun, making it a staple in the fashion and beauty world. From Meghan Markle’s elegant bun to Zoë Kravitz’s casual and messy style, there’s inspiration for everyone. Explore different looks and find the one that resonates with your personal style.
Caring for Your Hair
While top knot buns are a fabulous go-to style, it’s crucial to maintain the health of your hair. Regular conditioning, minimal heat styling, and proper care routines will ensure your hair remains shiny and damage-free.